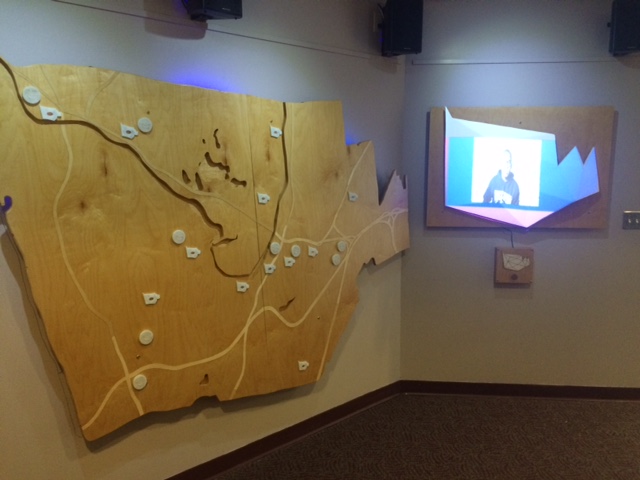
Placeholders were created to allow the screen to produce information and run the way the interactive map is supposed to run. It is now in conjunction with the community and the locations with the community that students and teachers will be able to work together to continuously construct and create the imagery and video media for these locations.
Setting up the projection surface and mapping.
With the projector set up it was time to test the projection mapping onto the sculptural surface created by the students. Using projection mapping software the area was masked out and the end result was very clean and interesting.
Redesigns and Fixes
After installation several parts of the assembly needed to be reworked and redesigned. The button that triggers the video LCD screen was one such problem. A solution was created and the end result wound up working better and being much more visually pleasing.
The Map Installation!
The map is blocked in and ready to be hung. Students and teachers work together to line up the work and set it in place.
Finishing touches are added and the touch sensors are put together.
Finishing the Electronics!
The rest of the electronics get assembled and placed behind the map reaching through only at the designated button spots. Once tested the map can now be hung and attached to the permanent location!
The Community Begins to Share their Stories
Designing Information Box
To accompany the map students designed an informational plaque. This creation would hold student created literature about the map and an audio recording which explains the map, the process of creation, and ways to become involved in the project.
The audio recording was created and coded onto a raspberry pi micro processor and embedded in a neat housing that was attached to the plaque. Students developed a way to get the audio onto the mini computer and allow it to loop infinitely.
Students then designed and cut the boxes that would hold the pamphlets and hardware.
The goal is to clarify the project as a whole and create visual balance among the installation at the library.
Map construction finished!
The maps are finally poly-coated and look AMAZING! Everyone involved did a great job in the creation of these two pieces and they will look wonderful when hung up at the library. Special thanks to all the students that designed, cut, assembled, glued, painted, and carried these maps around. Next up is beginning to attach the locations and wire up all the electronics.
Adding and testing electronics
After printing the buttons that will house the electronics, they are put to the test to see if everything works and fits the design. Copper tape adhered to the inside of the lid will create the conducting for the touch sensitive sensor to work.
Geometric Map Painting.
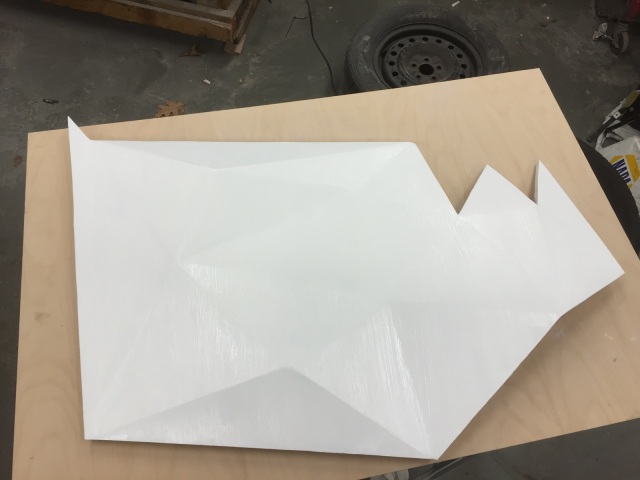
The map gets a coat of white paint to create a uniform and bright surface to display the projected images.